


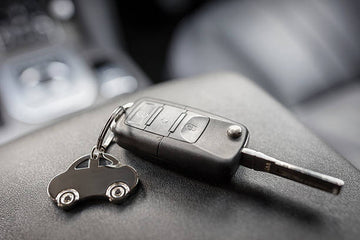
As a professional locksmith, expanding your service offerings to include car key fob programming can significantly boost your business revenue and customer satisfaction. Car key fobs have evolved from simple remote controls to sophisticated devices integrating transponder technology, proximity sensors, and digital security features. When customers come to you with a lost, damaged, or malfunctioning key fob, having the expertise to program these devices in-house allows you to offer immediate solutions without dealer referrals.
This comprehensive guide outlines the step-by-step process for programming car key fobs across various vehicle makes and models, helping you add this valuable service to your locksmith repertoire while saving your customers considerable time and money compared to dealership rates.
Step-by-Step Guide to Programming a Car Key Fob

Step 1: Check Compatibility
Before investing time in programming a car key fob, it's crucial to ensure the remote is compatible with your specific vehicle:
-
Review your vehicle's owner manual: The manual typically contains detailed information about compatible key fob models and specific programming instructions tailored to your car.
-
Check the fob model number and frequency: Key fobs operate on specific radio frequencies, and using one with the wrong frequency will never work, regardless of programming attempts. Look for a model number on the fob itself or its packaging and cross-reference it with your vehicle's requirements.
-
Verify OEM vs. aftermarket compatibility: Original Equipment Manufacturer (OEM) fobs are designed specifically for your vehicle brand and typically offer the best compatibility. Aftermarket options may work but confirm compatibility before purchasing.
-
Consider vehicle security systems: Some vehicles with advanced security systems or immobilizers require specialized programming equipment only available to dealerships or licensed locksmiths.
-
Check your Vehicle Identification Number (VIN): In some cases, you may need your VIN when purchasing a compatible key fob, as certain programming procedures are specific to production runs or manufacturing dates.
Using an incompatible key fob will result in wasted time and money, so this verification step is crucial before proceeding with programming a car key fob.
Step 2: Gather Materials
Successful key fob programming requires preparation. Having all necessary items ready before you begin will prevent frustrating interruptions:
-
The key fob you want to program, with packaging and instructions if available
-
Working car keys (many vehicles require at least one working key to enter programming mode)
-
Vehicle owner's manual for reference on specific programming sequences
-
Fresh batteries for the key fob to ensure optimal signal strength during programming
-
Timer or watch with second hand for precise timing (many programming sequences require exact timing between steps)
-
Notepad and pen to document successful steps in case you need to repeat the process later
-
Vehicle registration or proof of ownership (some vehicles have security measures that may require verification)
-
Comfortable seating in the vehicle, as some programming procedures can take time and require multiple attempts
Having everything prepared beforehand creates an efficient workflow and prevents having to restart the programming process due to interruptions, which could require you to begin again from step one.
Step 3: Enter Programming Mode
This critical step varies significantly depending on your car make and model, but here are some common methods to enter the programming mode when programming a car key fob:
General method for many vehicles:
-
Ensure all doors are closed and the car is in the "park" position
-
Sit in the driver's seat with all doors closed but unlocked
-
Insert your working key into the ignition
-
Turn the key from the "OFF" to "ON" position (without starting the engine) several times in quick succession (usually 3-8 times depending on the manufacturer)
-
Look for indicators that you've entered programming mode – these typically include:
-
Dashboard lights flashing in a pattern
-
Door locks cycling (locking and unlocking automatically)
-
Audible beeps or chimes
-
Display message on digital dashboard (in newer vehicles)
Brand-specific examples with detailed instructions:
-
Ford vehicles:
-
Insert key and turn from OFF to ON position eight times rapidly (within 10 seconds)
-
The eighth turn should end in the ON position
-
Doors will lock and unlock automatically to confirm entry into programming mode
-
Proceed to the program within 20 seconds or the system will time out
-
Toyota vehicles:
-
Open the driver's door and keep it open
-
Insert key, remove, and insert key twice within 5 seconds
-
Close and open the driver's door twice
-
Insert the key and turn to the "ON" position
-
The hazard lights will flash twice to confirm the programming mode
-
GM vehicles:
-
Insert key, turn to ON position (without starting engine)
-
Turn back to OFF, repeat this cycle rapidly 3 times ending in ON
-
Door locks should cycle to confirm the programming mode
-
If locks don't cycle, the vehicle may not support self-programming
-
Honda vehicles:
-
Enter the driver's seat and close all doors
-
Insert key into the ignition
-
Turn to the "ON" position and back to "OFF" (don't start the engine)
-
Within 5 seconds, press and release the "UNLOCK" button on the driver's door
-
Within 5 seconds, turn the key to "ON" again
-
Door locks should cycle to confirm the programming mode
Remember, these are general examples. Always consult your specific vehicle's manual for the exact procedure, as incorrect sequences can potentially lock you out of programming mode temporarily or require a system reset.
Step 4: Program the Key Fob
Once you've successfully entered programming mode, follow these general steps when programming a car key fob:
-
Press the key fob buttons in the sequence specified by your car's manual. This typically involves:
-
Pressing and holding specific buttons (like LOCK and UNLOCK simultaneously)
-
Pressing buttons in a particular order
-
Holding buttons for specific periods (often 3-15 seconds)
-
Watch for confirmation signals from your vehicle:
-
Flashing lights (interior or exterior)
-
A horn sounds or beeps
-
Door lock movement
-
Dashboard display messages
-
Follow timing requirements precisely—many programming sequences require specific timing between button presses:
-
Some vehicles require buttons to be pressed within 5-10 seconds of entering programming mode
-
Others require holding buttons for exact durations (count or use a timer)
-
Rushed or delayed actions can cause programming failure
Common programming patterns by manufacturer:
-
Ford: While in programming mode, press any button on the key fob. The doors should lock/unlock to confirm successful programming. For additional fobs, press any button on each fob within 20 seconds of the previous fob.
-
Toyota: Once in programming mode, press and hold both LOCK and UNLOCK buttons for 1-2 seconds, then release. Doors should lock/unlock to confirm. For additional fobs, repeat this process within 30 seconds.
-
GM: While in programming mode, press and hold the LOCK and UNLOCK buttons simultaneously until doors lock/unlock (typically 15 seconds). For additional fobs, repeat this process within 30 seconds.
-
Honda: Press any button on the remote while in programming mode. The locks should cycle to confirm successful programming. For additional remotes, press any button on each remote within 10 seconds.
For vehicles with push-button start systems or advanced security features, the programming procedure may be more complex and potentially require dealer assistance with specialized equipment.
When programming multiple key fobs, most vehicles allow programming them consecutively without exiting programming mode—typically within a 30-second window after the previous fob is programmed.
Step 5: Test the Key Fob
After completing the programming sequence, proper testing is essential to ensure functionality:
-
Exit programming mode according to your vehicle's instructions:
-
This typically involves removing the key from the ignition
-
Turning the ignition to the OFF position
-
Opening the driver's door
-
Or waiting for a system timeout (usually 30-60 seconds of inactivity)
-
Test all functions of the newly programmed fob:
-
Lock/unlock all doors (check that all door locks respond)
-
Trunk/hatch release function
-
Panic alarm activation and deactivation
-
Remote start (if equipped)
-
Any other special functions (like power sliding doors, windows, or memory seat positions)
-
Test at different distances from the vehicle:
-
Stand next to the vehicle for initial testing
-
Move approximately 20 feet away and test again
-
Test from the maximum expected operating distance (typically 30-50 feet)
-
Test with obstacles between you and the vehicle (like walls or other cars)
-
Verify battery efficiency:
-
If the range seems limited, the battery might be weak despite being new
-
The poor range could also indicate partial programming success
If any function fails to work properly, you may need to:
-
Repeat the programming process from the beginning
-
Check for specific error patterns that might indicate what went wrong
-
Consult your vehicle manual for troubleshooting guidance
-
Consider if dealer programming might be necessary
Troubleshooting Tips for Car Key Fob Programming
If you encounter issues when programming a car key fob:
Fob Not Responding:
-
Ensure the key fob has a fresh battery
-
Verify the fob is compatible with your vehicle
-
Pay careful attention to timing requirements
Vehicle Not Entering Programming Mode:
-
Ensure you're turning the key at the correct speed
-
Check your car battery—a weak battery may prevent programming mode
-
Some vehicles have a security timeout after failed attempts—wait 15 minutes before trying again
When to Seek Professional Help:
-
If you can't enter programming mode after multiple attempts
-
When your vehicle requires special equipment for programming
-
If your key fob contains a transponder chip (common in push-button start vehicles)
Need a new key fob or programming equipment? Check out Auto Key Technology for a wide selection of key fobs, remotes, and programming tools to enhance your services.
Final Words
Adding car key fob programming to your locksmith services creates a valuable additional revenue stream while positioning your business as a comprehensive automotive security solution. By mastering these programming techniques, you'll not only save customers 50-70% compared to dealership prices but also complete jobs in minutes rather than hours.
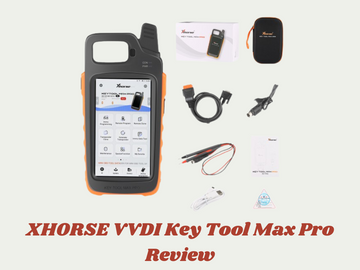
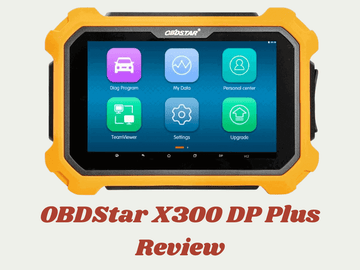
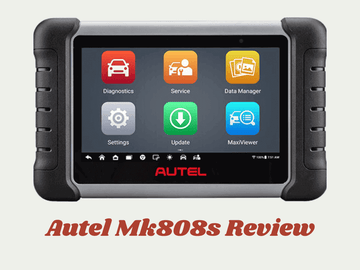
Consider creating a pricing structure that reflects the complexity of different vehicle systems while remaining competitive. Invest in quality programmers like the AKT, Autel, OBDStar, or Strattec to handle a wider range of vehicles. Remember to stay updated on new vehicle security technologies through manufacturer subscriptions and forums. With these skills, you'll establish your locksmith business as the go-to expert for all automotive key and security needs in your service area.